Get Up and Running with Liquibase and Apache Cassandra
October 20, 2020
See Liquibase in Action
Accelerate database changes, reduce failures, and enforce governance across your pipelines.

There is a lot of activity around Liquibase Extensions and new database platforms. (A direct result of our Liquibase Labs initiative.) Since there is so much activity going on around our updated database extensions, it can be hard to keep track of all the latest improvements! So, today I’m going to focus on one of them: Cassandra.
Cassandra is a popular database engine (#10 on the popularity list according to DB-Engines) and there have been some recent improvements in the Liquibase Labs Extension for it. This blog takes you through how to get started with a quick test environment so you can use the Liquibase Cassandra extension. The goal is simply to be able to have a verifiable example setup to test basic, useful Liquibase functionality.
Environment
- CentOS 7.8
- Docker 19.03
- Docker Hub connection
- Liquibase 4.1.1
- Liquibase Extension for Cassandra 4.1.1.2
- Simba JDBC Driver for Apache Cassandra
Set up Liquibase
Install Liquibase
Follow the installation instructions for installing Liquibase.
Take note of which directory you choose for installation. You�ll use this information in the next step.
Extension and JDBC Driver
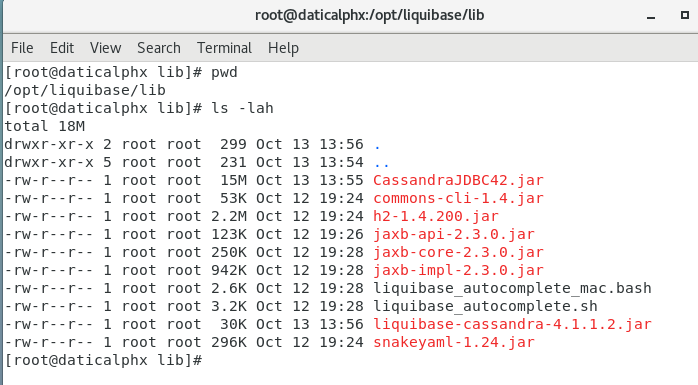
- Download the Liquibase Extension for Cassandra 4.1.1.2 and the Simba JDBC Driver for Apache Cassandra. You will end up with two .JAR files.
- Place both files in the [liquibase install directory]/lib directory.
- Set the ownership and permissions for the two JAR files to exactly match the other files in that directory.
Set up Cassandra
For the purposes of this test, we are going to use a disposable Docker container to run Apache Cassandra. We are not trying to retain data or do any processing, so we will not be bothering to mount storage.
- Pull and run a container based on the official Apache Cassandra image in Docker Hub.
# docker run --name cass -p 9042:9042 -d cassandra:3.11.8
- Get a shell prompt inside your new container
# docker exec -it cass bash
- Log in to your new Apache Cassandra instance with default credentials (u: cassandra / p: cassandra)
# docker exec -it cass bash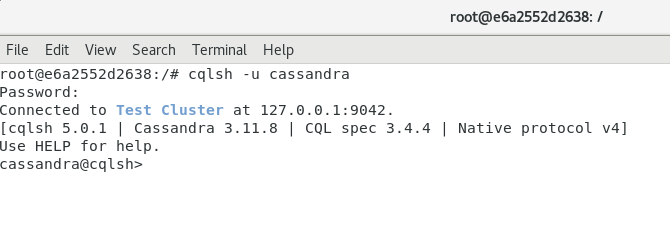
- Inside of the Apache Cassandra CQL shell, create a simple Keyspace for the test
cqlsh> CREATE KEYSPACE test01 WITH replication = {'class':'SimpleStrategy', 'replication_factor' : 1};- Inside of the Apache Cassandra CQL shell, inspect your keyspaces to verify that the new one (test01) was created successfully.
cqlsh> DESCRIBE keyspaces;
- Inside of the Apache Cassandra CQL shell, create a test table to ensure that this is working properly inside the database engine natively.
cqlsh> CREATE TABLE test01.TESTME ( foo int PRIMARY KEY, bar text );- Inside of the Apache Cassandra CQL shell, inspect the tables in your database to make sure that the test table was created successfully in your new keyspace.
cqlsh> describe tables;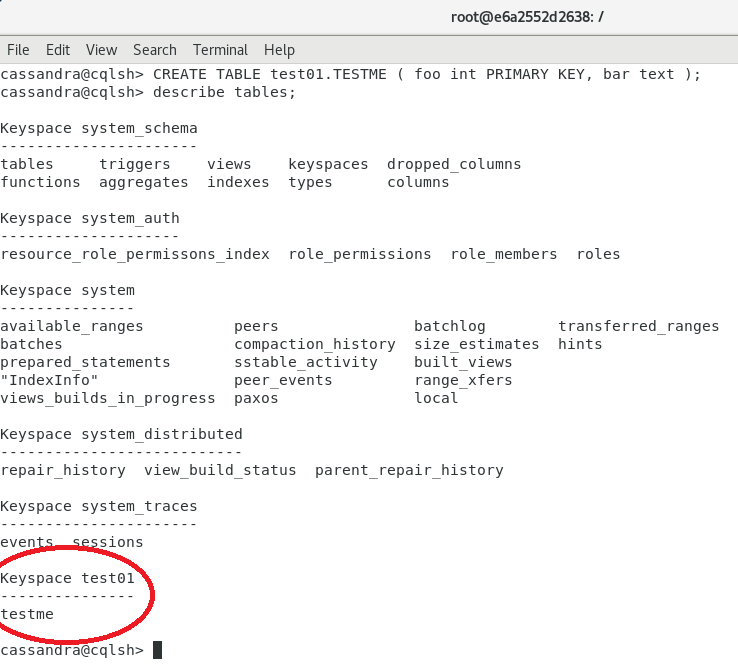
Run Liquibase Commands
Set up Working Directory
In order for Liquibase to connect to and operate with a database engine, it requires some configuration parameters so that it can connect to the database and some changes to actually run into the database. These are contained in two configuration files:
- liquibase.properties for the configuration
- An arbitrarily named “Changelog” file for the database changes
NOTE: Both the liquibase.properties and “Changelog” files have a lot of options and format variations for supporting very large and very complex environments. For the purposes of this test, we are just going to use some basic approaches.
Create Working Directory
- Create an empty directory.
- Change into your new directory.
Create Changelog File
For the purposes of this exercise, we are going to use Liquibase’s ability to use changes as Formatted SQL. We will make all of our changes in basic SQL and call the changelog file casschangelog.sql. We will create two Changes (called “Changesets” in Liquibase) to work with in our example file.
- Inside your new directory, create a new file called casschangelog.sql.
- Populate the new file with the following lines:
--liquibase formatted sql

--changeset bob:1
>CREATE TABLE test01.TESTME2 ( foo int PRIMARY KEY, bar text );
--rollback DROP TABLE test01.TESTME2;

--changeset bob:2
CREATE TABLE test01.TESTME3 ( foo int PRIMARY KEY, bar text );

--rollback DROP TABLE test01.TESTME3;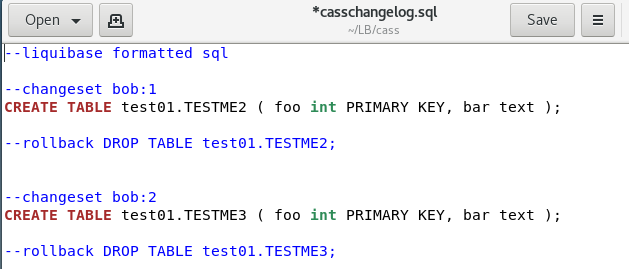
Create liquibase.properties File
- Inside your new directory, create a new file called liquibase.properties.
- Populate the new file with the following lines:
changeLogFile: casschangelog.sql
url: jdbc:cassandra://localhost:9042/test01;DefaultKeyspace=test01
username: cassandra
password: cassandra
driver: com.simba.cassandra.jdbc42.Driver
defaultSchemaName: test01
Run Tests
Check Your Connection - Liquibase Status
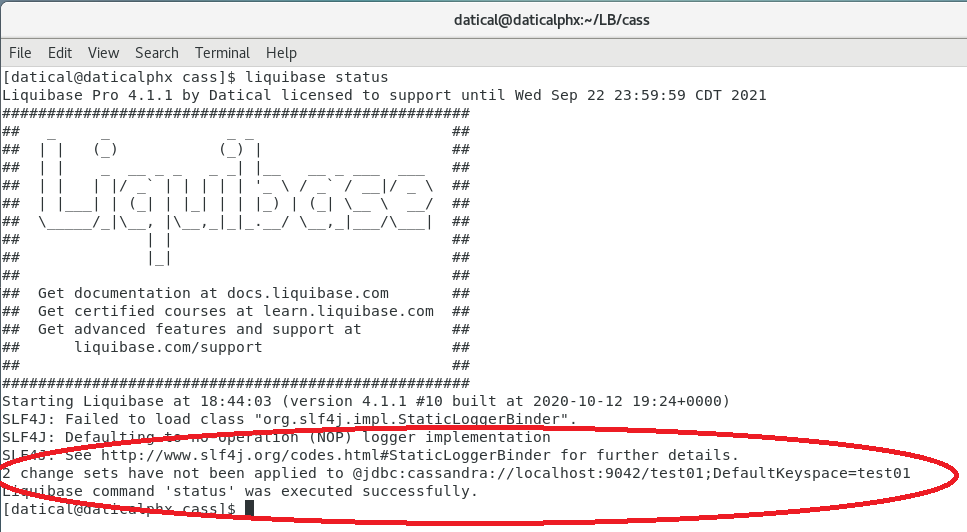
From within your directory, run liquibase status and review the results. You should see that there are two changesets that have not been applied to your database.
Apply the Changes - Liquibase Update
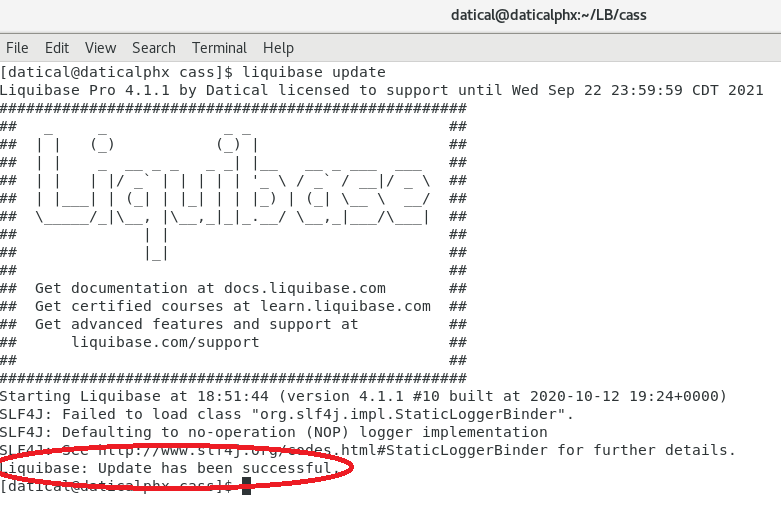
- From within your directory, run liquibase update and review the results. You should see a message that the update has been successful.
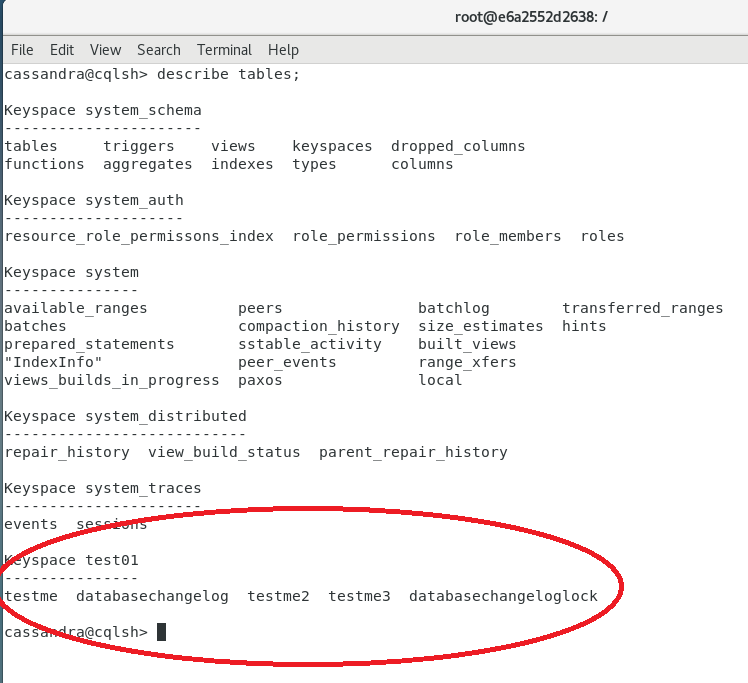
- You can verify the tables were created via the CQLSH prompt in your Cassandra container by re-running the DESCRIBE tables; command within that shell. You will also see the Liquibase control tables (DATABASECHANGELOG and DATABASECHANGELOGLOCK) and your original test table from above.
Review the Change History - Liquibase History
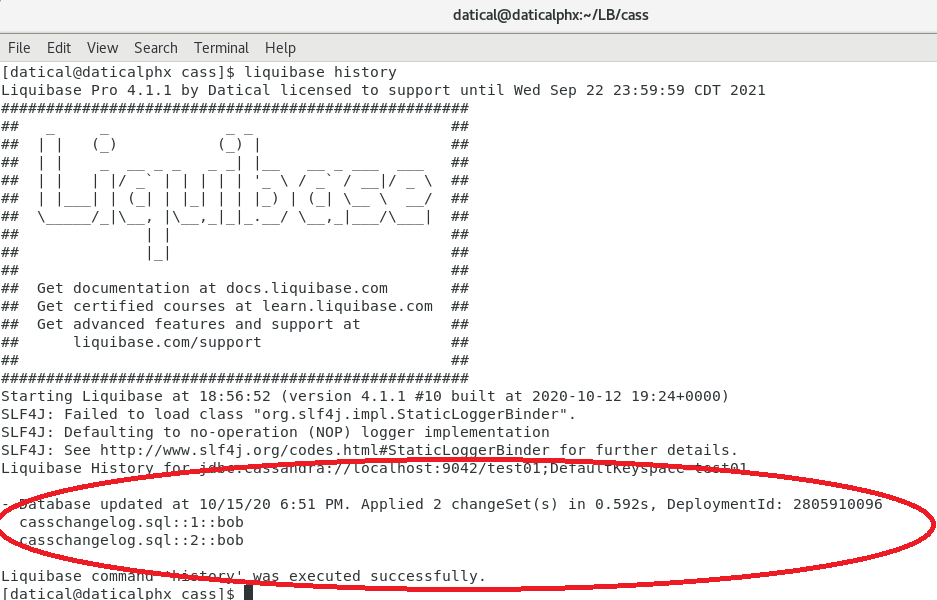
From within your directory, run liquibase history and review the results. You will see two records�one for each Changeset in your Changelog file.
Roll Back One of the Changes - Liquibase Rollback Count 1
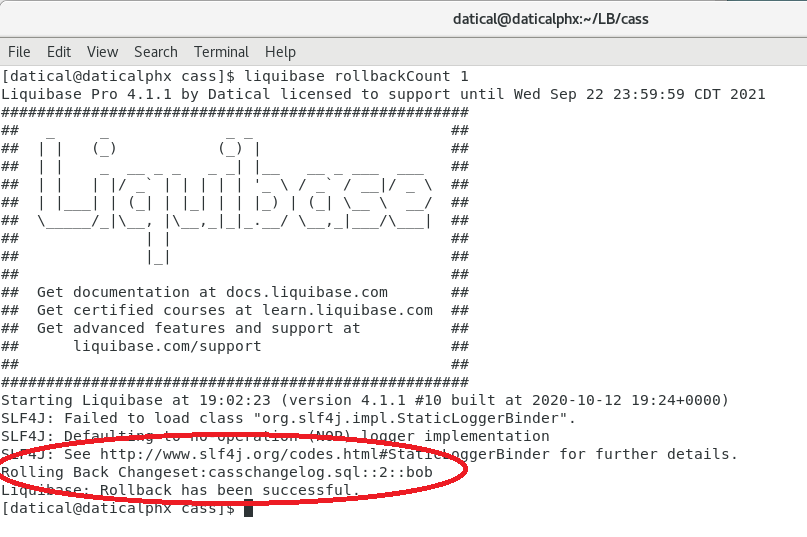
Next, I’ll show an example of rolling back a change. Liquibase has a lot of ways to do rollback and can be extremely precise and granular — which is important for a potentially destructive operation. For the purposes of this example, we are simply going to rollback the single last change we put in. Note that this is not the same as the last update — which contained two changes. Rolling back one change will only remove the second of those changes.
- From within your directory, run liquibase rollbackCount 1 and review the results. You should see that there are two changesets that have not been applied to your database.
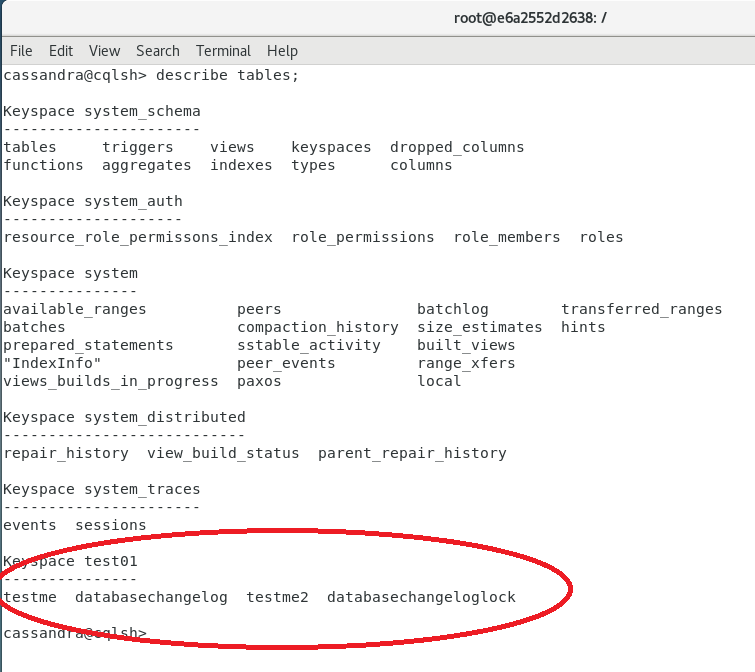
- You can verify the tables were created via the CQLSH prompt in your Cassandra container by re-running the DESCRIBE tables; command within that shell. You should see that the testme3 table has been removed from your example keyspace.
Wrap up
Now Liquibase is updating your Cassandra database schemas. Remember that the Liquibase Labs extension for Cassandra is still undergoing development and is not part of the Liquibase Core yet. That said, it does have a lot of useful capabilities that can be used today with the knowledge that the integration will be getting progressively deeper over time. In fact, you can contribute to making it even better. If you notice issues, submit them! Even better, help us resolve issues by submitting pull requests.


.png)
.png)
.png)
.png)

